


How to Digitally Sign an Email Using Outlook
 (55 votes, average: 5.00 out of 5)
We’ll walk you through how to add your digital ID to Outlook in the form of an Outlook email signing certificate so you can send digitally signed messages
Knowing how to digitally sign an email is useful if you want recipients to know that your emails are legitimate and haven’t been modified since they were sent. This article aims to quickly walk you through sending digitally signed emails in Outlook Microsoft 365.
But we aren’t here to talk in-depth about what Outlook digital signatures are and why they matter; check out our previous article if you want to learn about those topics. But for now, let’s jump straight into how to digitally sign an email in Outlook.
3 Steps to Guide You Through How to Digitally Sign an Email in Outlook
Adding a digital signature to your outbound emails is as simple as 1, 2, 3 — literally. It really couldn’t be easier using Outlook in Microsoft Office 365.
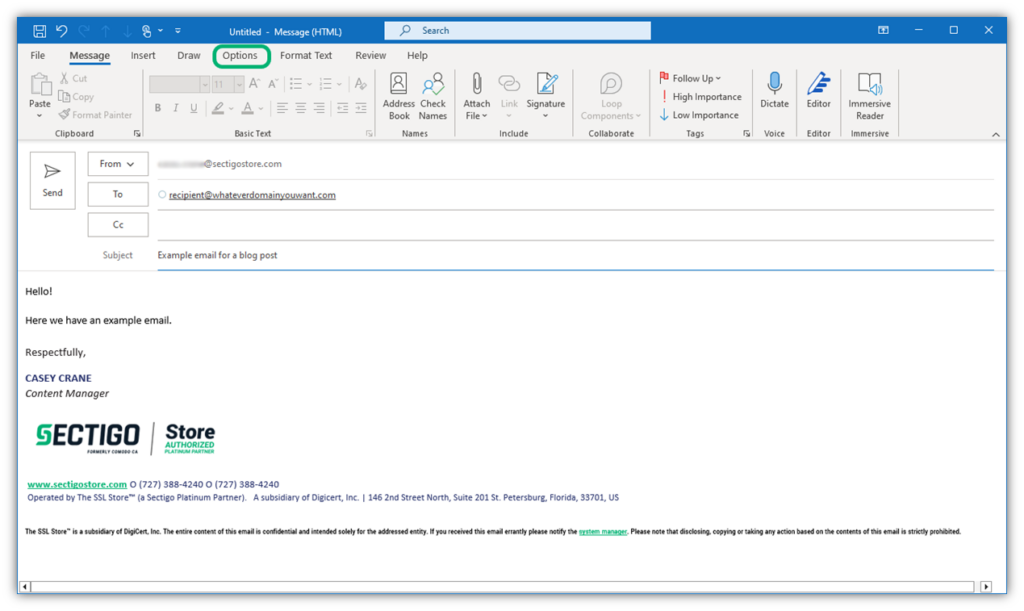
1. Create the Email You Wish to Encrypt in Outlook
Open a new email in Outlook, write whatever message you want to send, and add any attachments (if applicable).
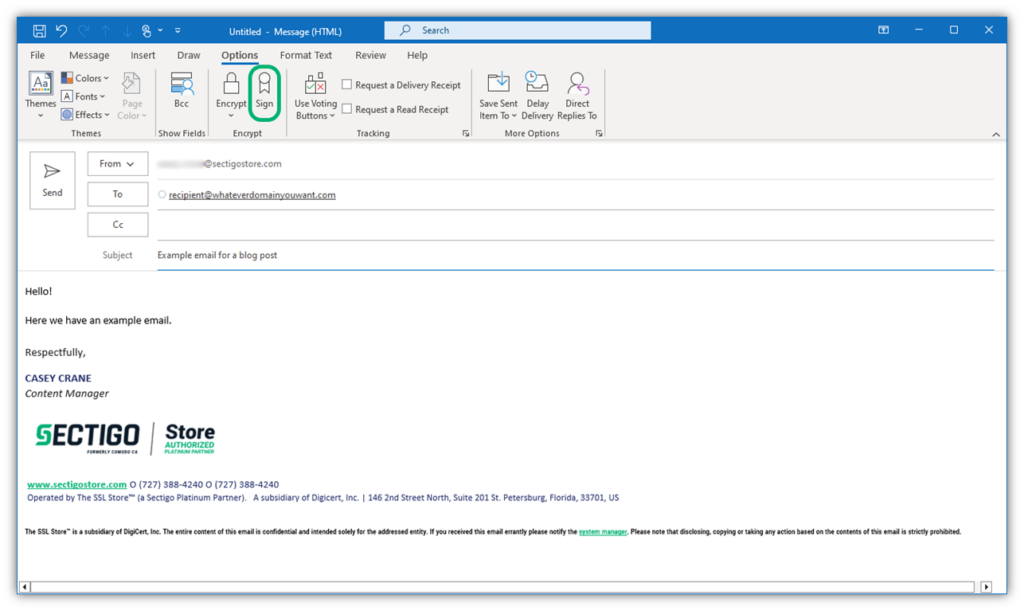
2. Add Your Digital Signature to the Email
In the top menu, navigate to the Options tab and select Sign in the Encrypt section.
3. Send Your Email
Now, the final step is to send your email to your recipient, which you can do by hitting the Send button. Yup, sending a digitally signed email is that easy when you use a digital ID certificate in Outlook. As we said a few moments ago, the process of digitally signing your email really can’t get any easier in Outlook.
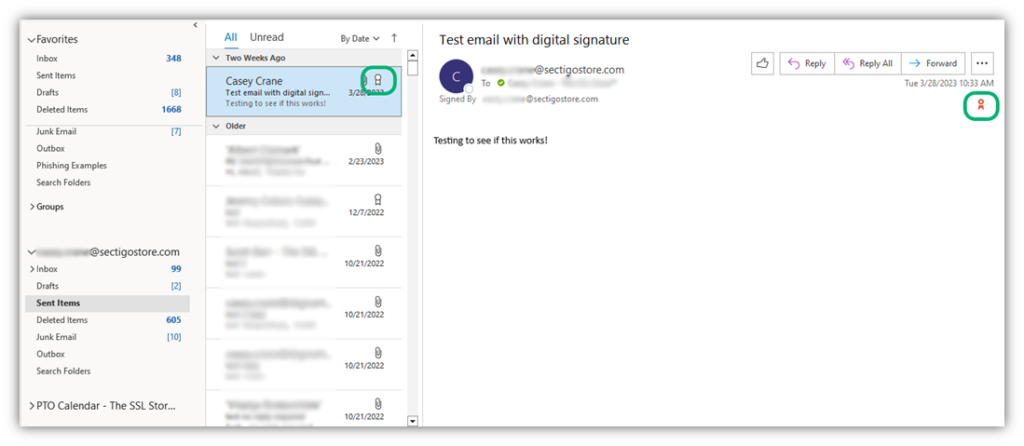
But how do you know that the signing of your email was successful? Check your sent mail folder. If you check Outlook’s sent mail folder, you’ll see that your outgoing message includes a small ribbon graphic, which denotes that the email was digitally signed:
How to Ensure All Outbound Messages Include Your Digital Signature
And once you select the Digital Signature option, you don’t have to re-select it every time you want to send a new email. But if you want to double-check to ensure Outlook automatically applies your digital signature to all outgoing emails, you’ll want to configure your settings in Outlook.
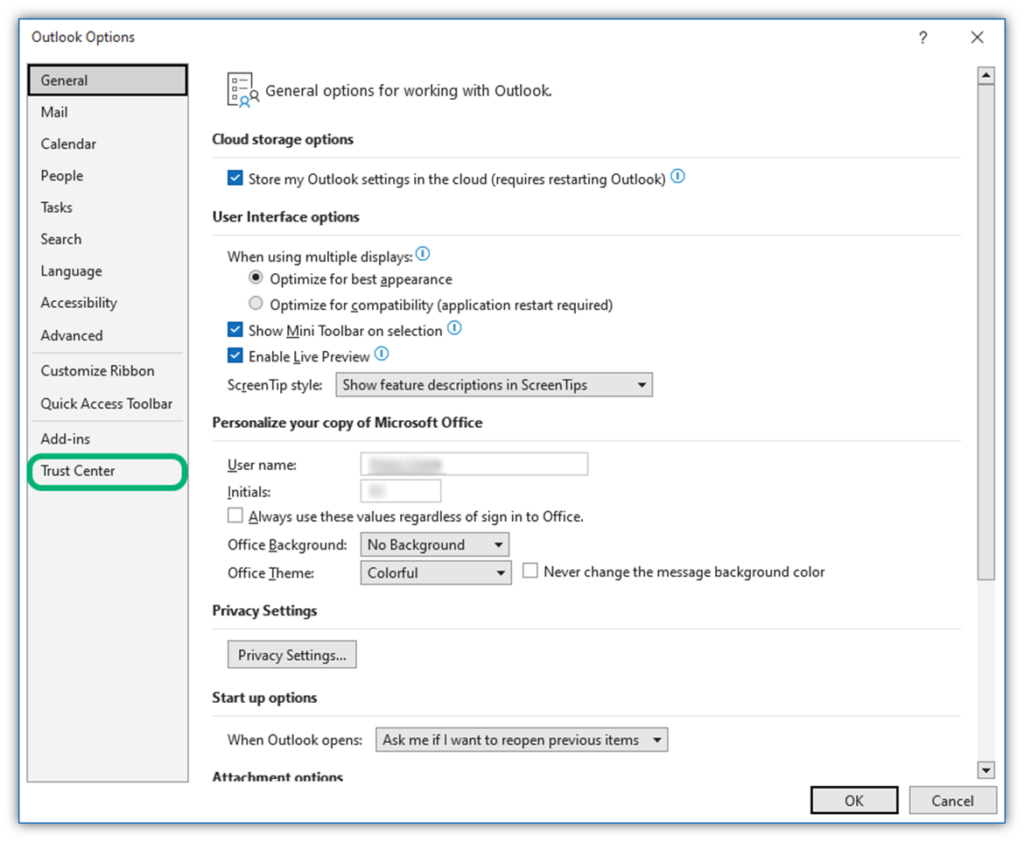
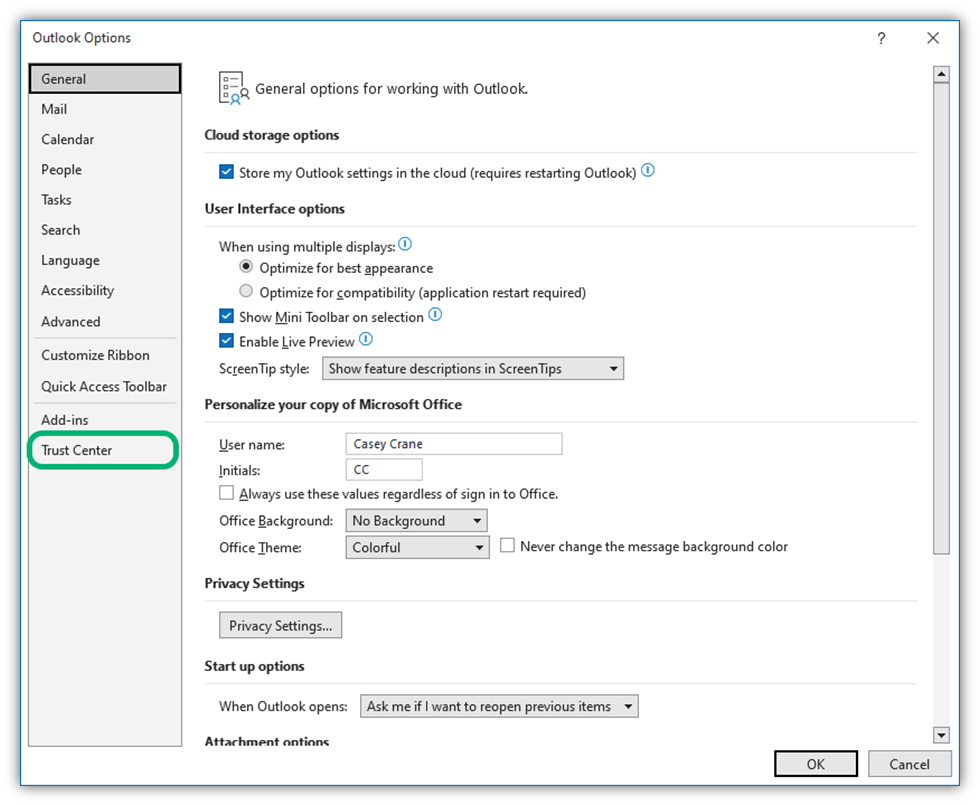
In your Inbox screen, navigate to File > Options > and select Trust Center in the popup window:
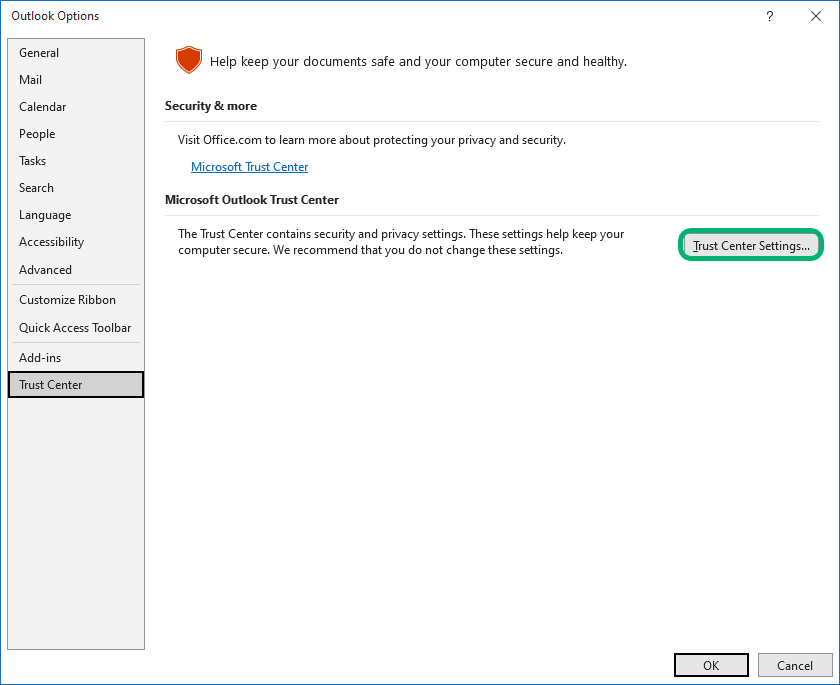
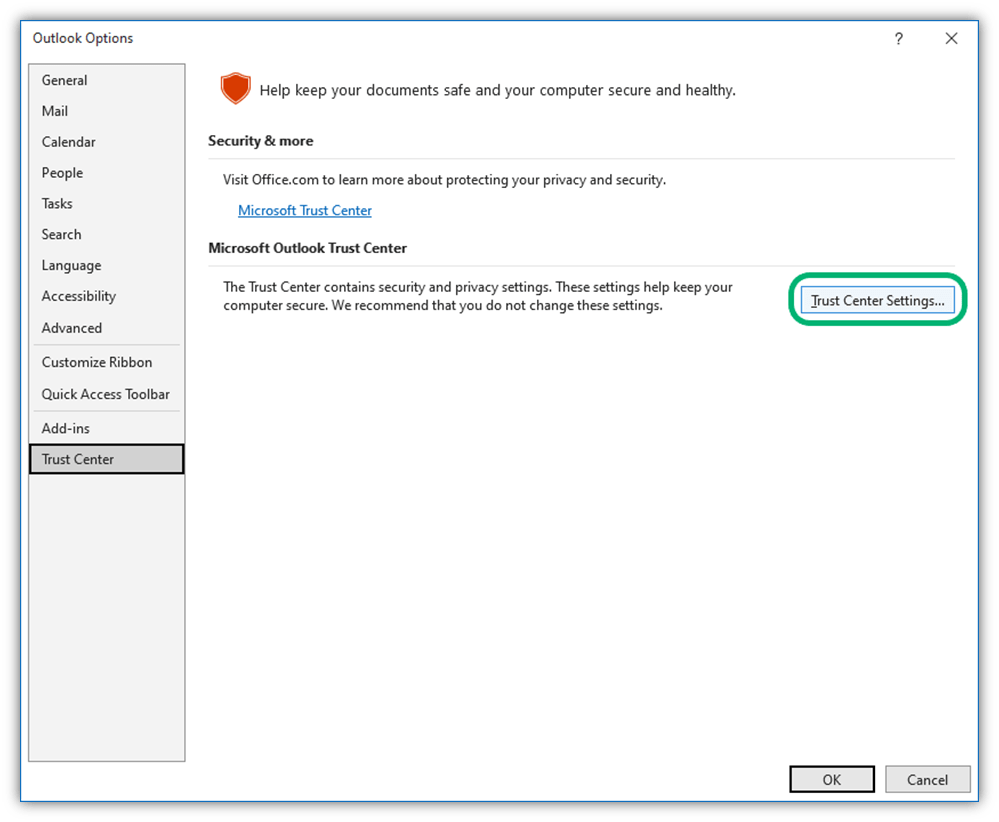
Once there, select Trust Center Settings (as shown below). This will open a new screen.
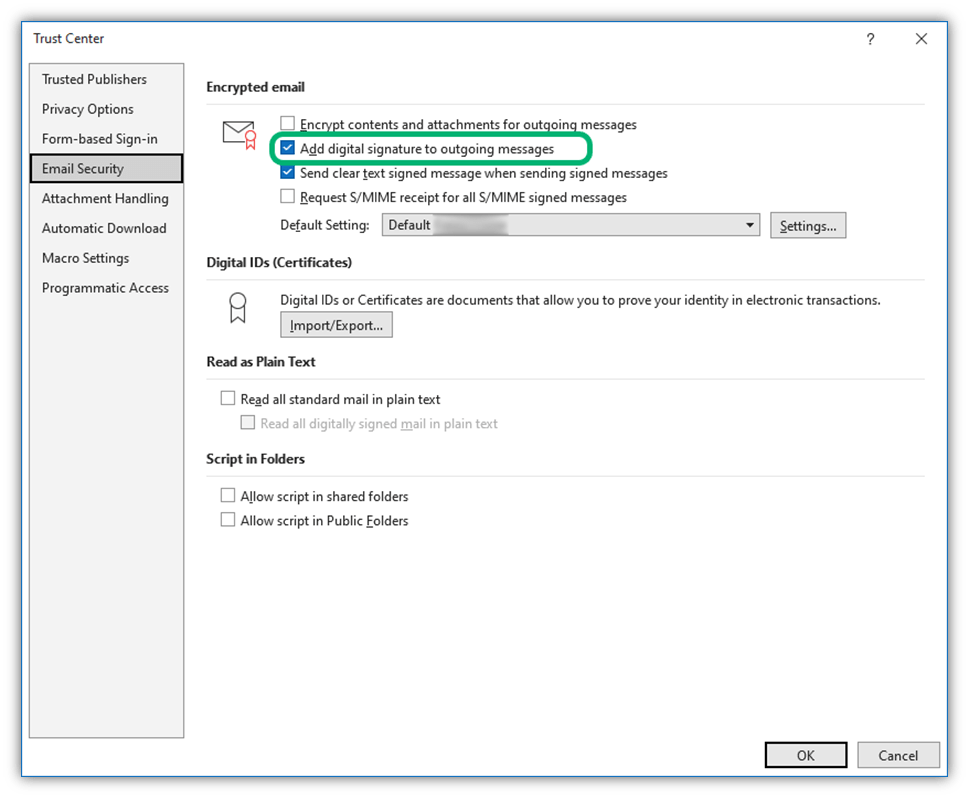
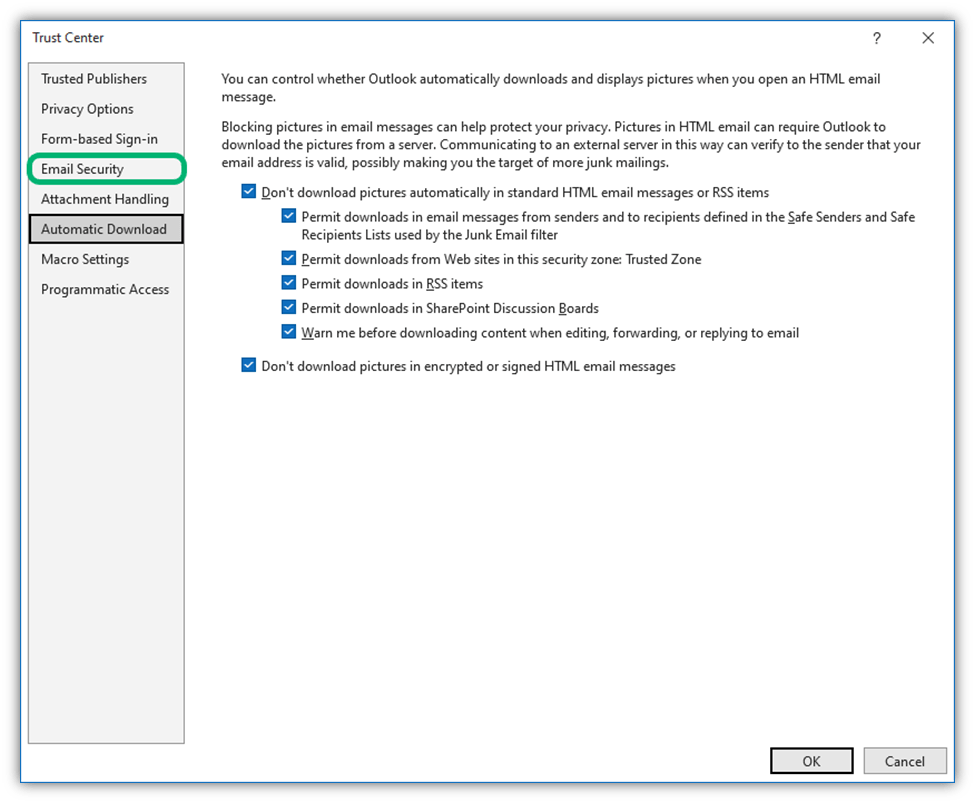
In the next window, select Email Security from the left-hand navigation bar. Under Encrypted Email (i.e., the topmost section), make sure to select Add digital signature to outgoing messages.
That’s it! Now your emails are set to add your verified digital signature automatically.
Of course, having the ability to sign an email in Outlook digitally is predicated upon two critical factors:
- You have the requisite digital certificate (i.e., an email signing certificate, or what’s sometimes called a personal authentication certificate), and
- That the digital certificate is installed in your email client or on your device. (We’ll talk more about that in just a few moments.)
Let’s dive into these processes to get you on your way to sending digitally signed emails in Outlook.
How to Get an Email Signing Certificate From a Trusted CA
- Purchase your email signing certificate. You can get an email signing certificate from a trusted certificate authority (CA) such Sectigo. Simply choose the CA and email signing certificate you want and then complete the requisite certificate signing request (CSR) form.
- Complete the validation process. Your chosen CA will engage in a verification process known as certificate validation. It’s a bit of a misnomer as it’s actually a process of verifying your individual or organization’s identity via official documents and resources. You’ll need to complete the personal authentication certificate validation process in order for the CA to issue your email signing certificate.
- Collect your email signing certificate. Once the validation process is complete, you’ll receive an email from your chosen CA. This email will provide information about how to access your email signing certificate.
How to Add Your Digital ID (i.e., Email Signing Certificate) to Outlook
In this series of steps, you’ll import your email signing certificate to Outlook or select the file if it’s already installed on your computer. In this example, we’re going to use the Outlook application that’s available through Microsoft Office 365.
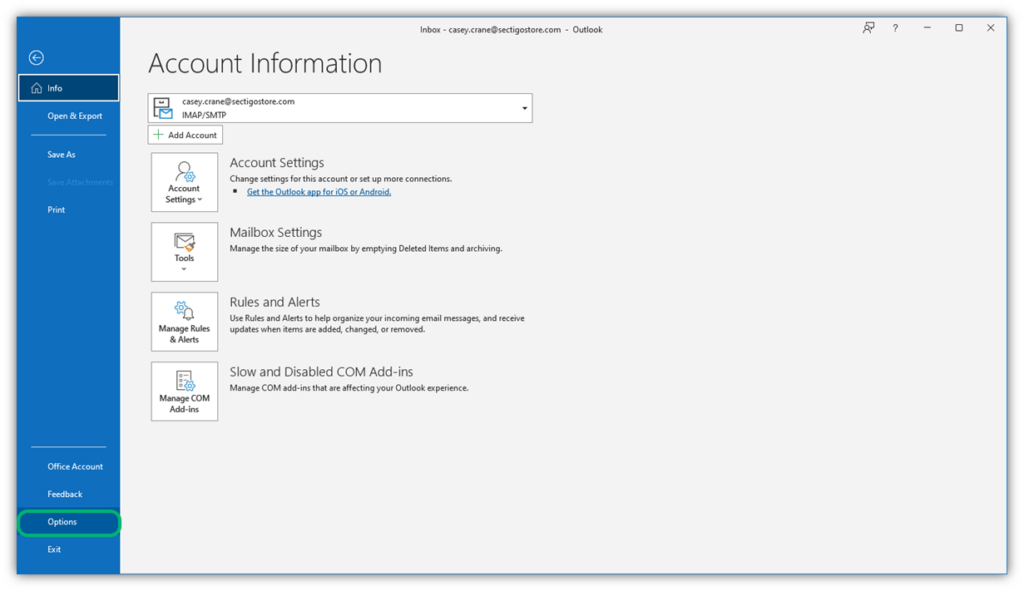
1. Open Outlook and Navigate to the File Menu
Once you’re in that menu, select Options, which is one of the bottom options in the left navigation bar.
2. Navigate to the Trust Center Settings
In this next step, you’ll select Trust Center in the left-hand navigation bar.
After that, press the Trust Center Settings button in the main window.
3. Access Your Email Security Settings
In the next Trust Center window, select Email Security in the left-hand navigation bar. This is where you need to make a decision about which process to follow based on your needs.
3a. Import Your Certificate to Outlook
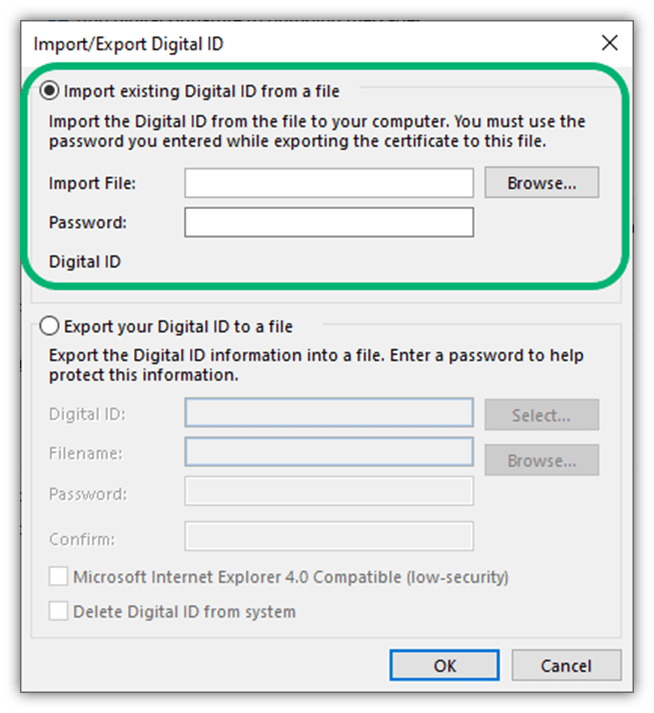
Here, you’ll find a section labeled Digital IDs (Certificates). Here, you’ll select the Import/Export option.
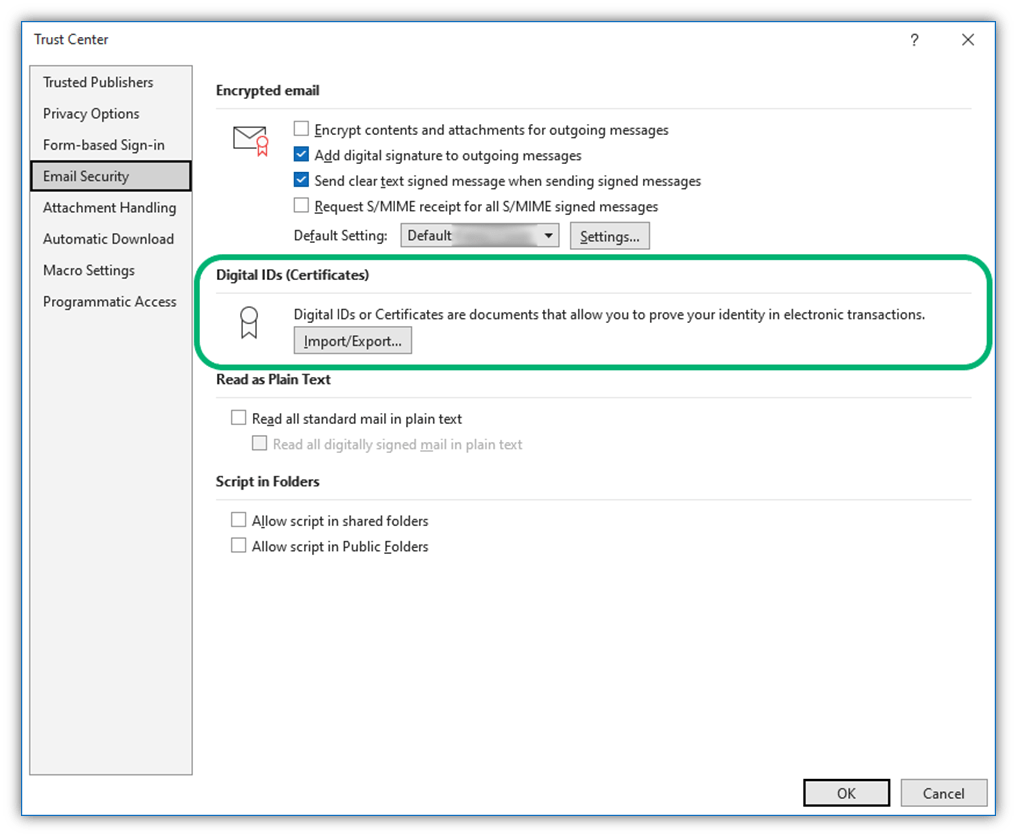
Upload your digital certificate. In this step and new window, you’ll need to select the certificate file you wish to upload and enter the certificate’s password.
But what if you already have the certificate installed in your computer’s trust store? Then we’ll go back to step #3, but rather than selecting the Import/Export button in the Digital IDs (Certificates) section (6a), you’ll instead follow the next steps (3b).
3b. Choose the Certificate You Want to Use From Your Computer’s Trust Store
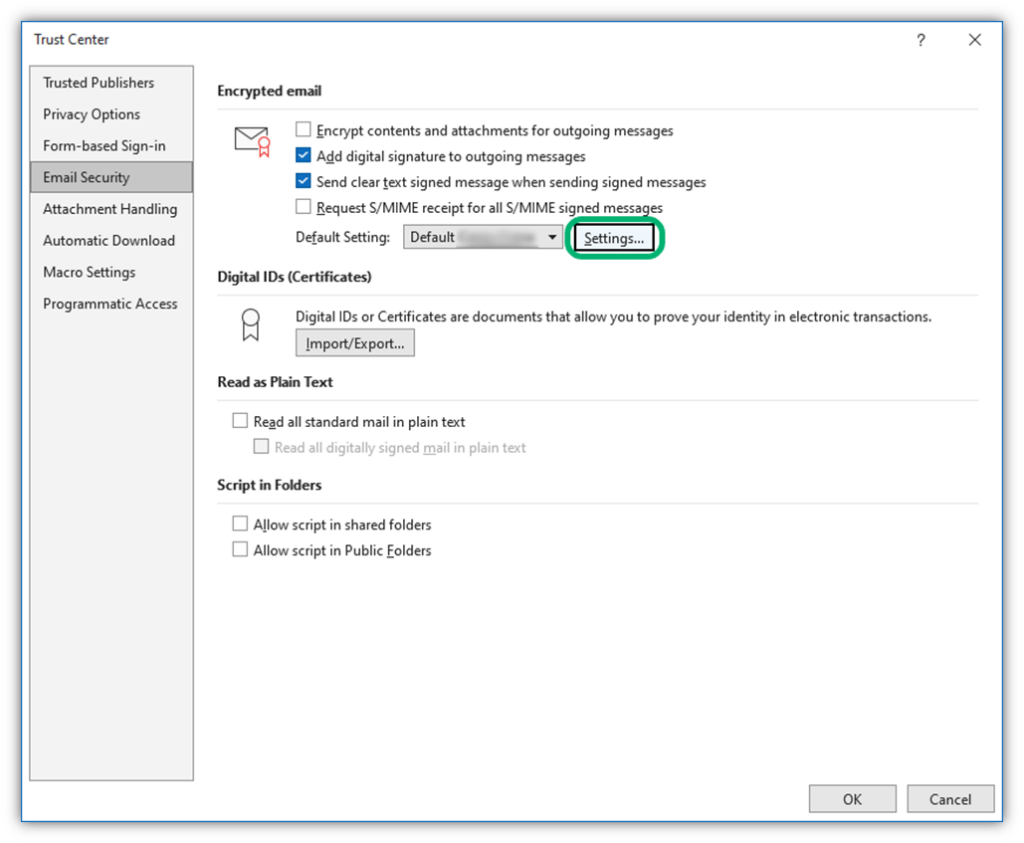
For this process, select the email account associated with the certificate in the Encrypted Email section. Next, press Settings:
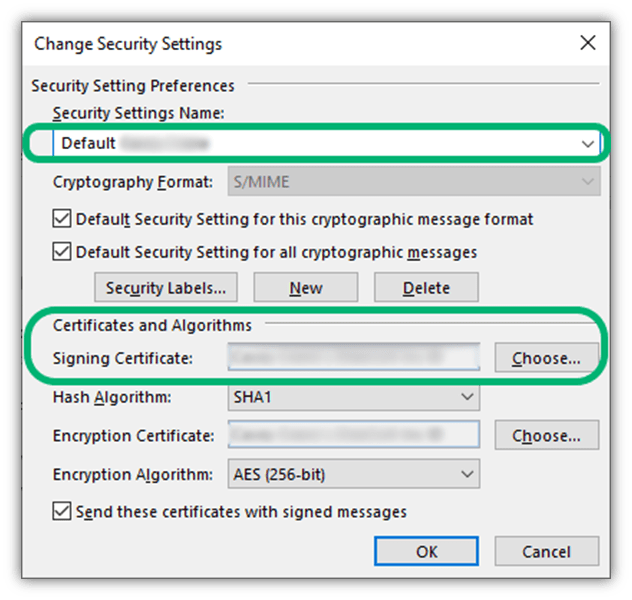
Select the email account and certificate. You can do this by selecting the correct account in the dropdown list under Security Settings Name. Next, you’ll need to hit Choose to select the signing certificate you wish to use. Once that’s finished, press OK and OK again.
That’s it for the initial setup! Now, you’re ready to use your certificate to digitally sign an email in Outlook.
Let’s Wrap Things Up
Understanding how to digitally sign an email using Outlook isn’t rocket science, but it’s important to know as it’s a way to add digital identity to your outbound messages. This is a must during a time when email-related breaches are occurring at record rates.
Of course, adding digital signatures isn’t all that these certificates are good for; they also enable you to send encrypted messages to recipients who also use email signing certificates. All you need is a copy of a recipient’s public key (which you can get by having them send you a digitally signed email) and you can start sending secure, encrypted messages right away. Easy as pie.
For more resources relating to digital signatures in Outlook, check out the following resources:


2018 Top 100 Ecommerce Retailers Benchmark Study
in Web Security5 Ridiculous (But Real) Reasons IoT Security is Critical
in IoTComodo CA is now Sectigo: FAQs
in SectigoStore8 Crucial Tips To Secure Your WordPress Website
in WordPress SecurityWhat is Always on SSL (AOSSL) and Why Do All Websites Need It?
in Encryption Web SecurityHow to Install SSL Certificates on WordPress: The Ultimate Migration Guide
in Encryption Web Security WordPress SecurityThe 7 Biggest Data Breaches of All Time
in Web SecurityHashing vs Encryption — The Big Players of the Cyber Security World
in EncryptionHow to Tell If a Website is Legit in 10 Easy Steps
in Web SecurityWhat Is OWASP? What Are the OWASP Top 10 Vulnerabilities?
in Web Security