
Here’s what to know about how to install an SSL Certificate on WordPress
Nowadays, SSL certificate is mandatory for all the websites to strengthen their security posture. But as soon as you complete the purchase, an SSL certificate doesn’t automatically get installed on your website. You must follow a couple of manual steps to add SSL to WordPress. In this article, we have included all the actions you required to migrate WordPress site to https.
How to Install an SSL Certificate in WordPress in 6 Easy Steps
Wondering how to install SSL in WordPress or how to migrate your WordPress site to HTTPS? Wonder no more — we’ve got you covered.
Step 1: Generate the Certificate Signing Request (CSR)
Different types of servers have different CSR generation processes. We’ve covered the CSR generation process for cPanel. If you have another type of server, be sure to check out our other CSR generation instructions.
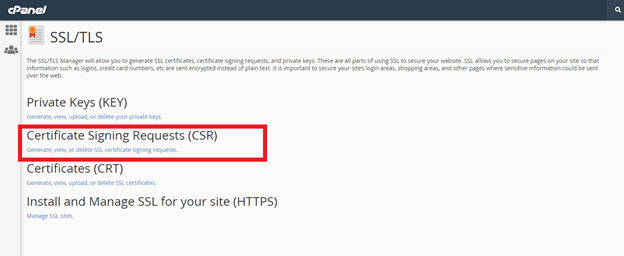
- Log in to cPanel.
- Click on SSL/TLS in the Security section.

- Go to Generate, view, or delete SSL certificate signing requests under the Certificate Signing Requests section.
- Complete the following fields with only alphanumeric characters:
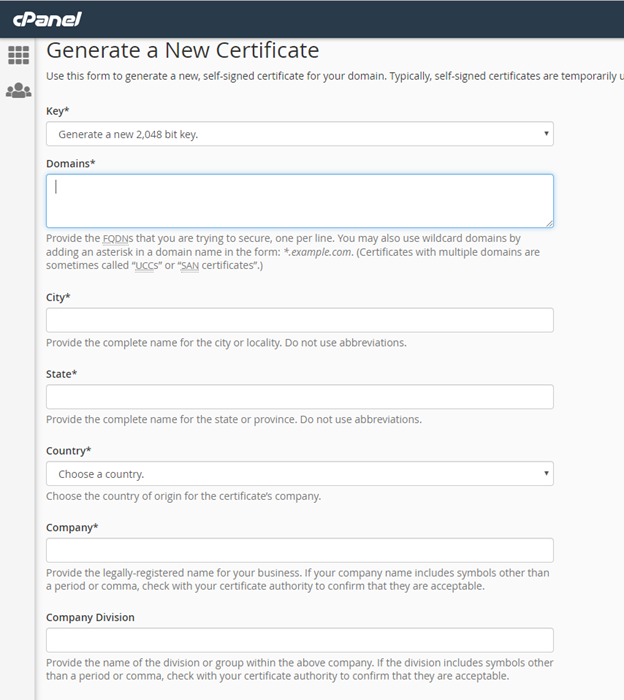
- Click Generate to create your new SSL/TLS certificate
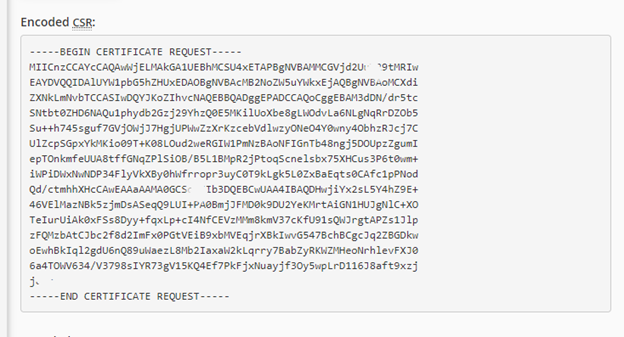
At this point, your private and public keys have been successfully generated. The generated CSR code is also known as the public key.
You need to send this CSR code to the certificate authority along with other required details.
Include the header and footer when sending your CSR to the certificate authority:
—–BEGIN CERTIFICATE REQUEST—–
—–END CERTIFICATE REQUEST—–
Step 2: Complete the Validation Process to Get the CA to Issue Your Certificate
After you send the required details along with your public key to the certificate authority (CA), the CA will vet your credentials against the type of validation you seek. The CA then will ask you to perform specific steps to prove your domain ownership. The CA may send you an email with the validation link or they may ask you to place some files on a specific location on the server. For OV and EV SSL certificates, you need to follow additional validation steps as well. Learn more about the validation process.
The CA will issue you the SSL certificate once the validation process is complete. They’ll email you files that you need to complete the certificate installation.
Step 3: Install the SSL on the Hosting Server
Different web hosts and servers have different installation process. We’ve covered the installation process for cPanel. If you are using a different server, check out our other installation guides.
Part 1
- Go to SSL/TSL under SECURITY in cPanel.
- Click on Generate, view, upload, or delete SSL certificates underCertificates(CRT)
- Locate Paste the certificate into the following text box under Upload a New Certificate. Copy-paste the code from the *yourdomain*.crt file which you have received from your chosen certificate authority in an email. You can also download it from your account directly. Be sure to include the header and footer (—–BEGIN CERTIFICATE—– and —–END CERTIFICATE—–) in the code.
- Click on Save Certificate or Upload.
OR
- Under Choose a Certificate File (*.crt), click on Choose File and upload .crt file that CA sent you in the email. Click Upload Certificate.
Part 2
Now go back to the previous (main) menu.
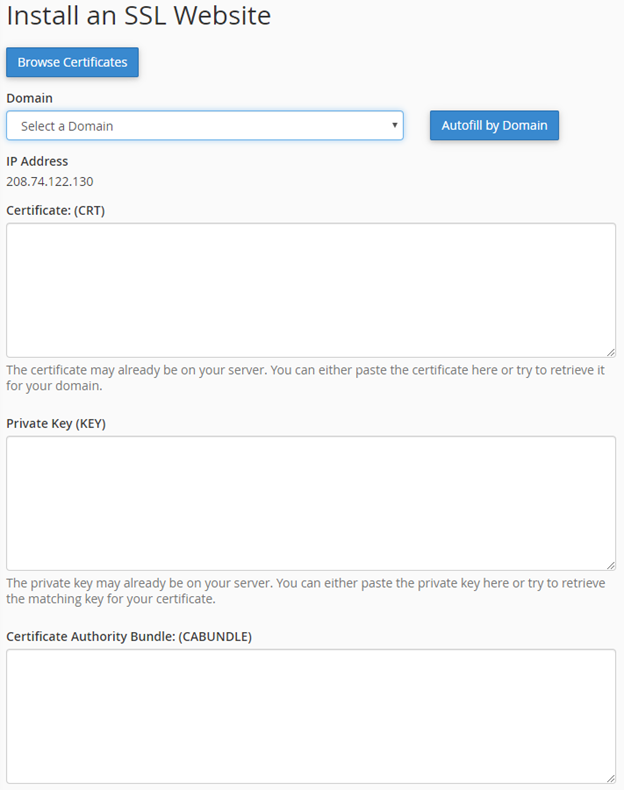
- Click on Manage SSL sites under Install and Manage SSL for Your Site (HTTPS).’
- Select the domain for which the SSL has been issued from the drop-down menu.
- At this time, the system will automatically fetch and fill the Certificate: (CRT) and Private Key (KEY) fields.
- Copy-paste the CA Bundle (chain of intermediate certificates) provided by the CA into the box under Certificate Authority Bundle (CABUNDLE).
- Click Install Certificate.
And it’s done! The SSL certificate is now installed on the server.
Now, the next step is to enable SSL in WordPress by switching your site URLs from HTTP to HTTPS.
Step 4: Add SSL to WordPress with a Plugin
One of the best plugins to install SSL in WordPress is the Really Simple SSL Plugin. This tool makes it exceedingly easy to add SSL to WordPress.
- Go to the WordPress dashboard.
- Go to Plugins and select Add New.
- Search and install the Really Simple SSL Plugin.
- Go to Plugins, locate Really Simple SSL Plugin, and click on Settings below it.
- Click on “Go ahead activate SSL!”
If there are no mixed content errors, your website will be shifted from HTTP to HTTPS.
Step 5: Resolve the Mixed Content Warning in WordPress (If Any)
When you migrate to HTTPS from HTTP, if everything (all the pages, images, scripts, stylesheet) don’t load over HTTPS, the browser shows a mixed content warning.
For example, when you’re using absolute referencing for images, scripts, stylesheet, etc.:
these pages are still pointing to your domain name with HTTP. However, your site is now on HTTPS. Your website address is HTTPS, but it’s trying to load content via the insecure HTTP URLs. That’s why the system shows the error.
Use plugins like Better Search Replace to fix mixed content errors.
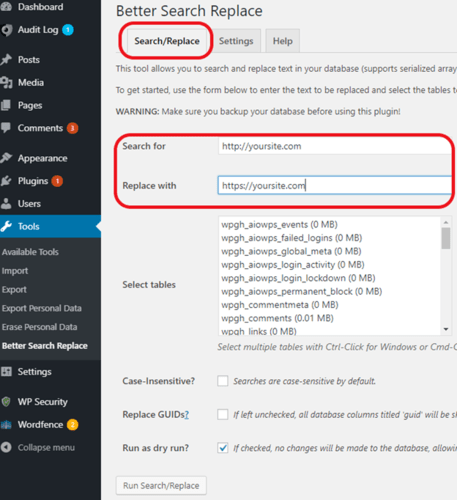
Under the Search/Replace tab, write your HTTP domain in the Search for andHTTPS domain in the Replace with fields.
Click on Run Search/Replace. This will replace all the absolute reference HTTP URLs with ones that start with HTTPS.
While we could stop here, we think that there’s actually one more critical step you need to complete before your website is ready to go.
Step 6: Update Google Analytics and Submit a New Sitemap to Google
This two-part process informs the search engine that your website will be delivered via HTTPS instead of HTTP.
Part 1
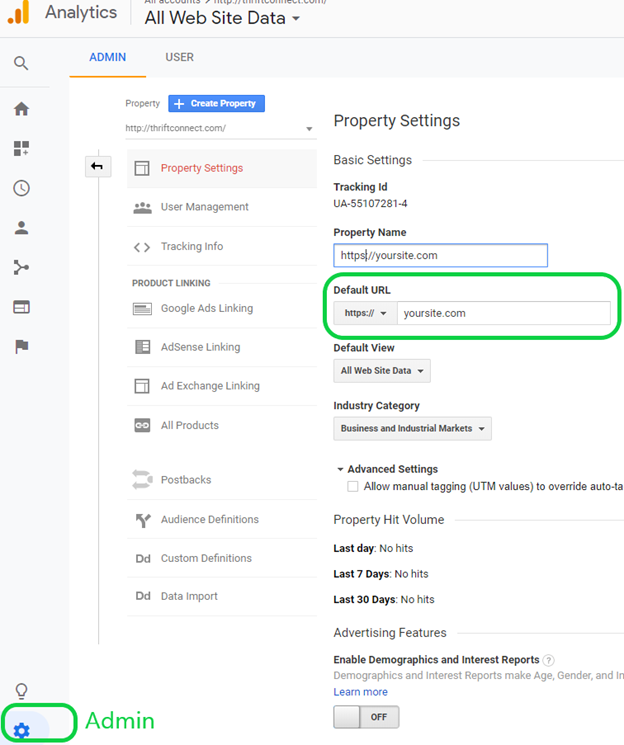
- Go to Google Analytics.
- Go to the Admin cogwheel in the bottom-left section of the window.
- In the center column, navigate to Property and select Property Settings.
- In the Default URL field, update your domain name with one that includes HTTPS.
- Press Save.
Part 2
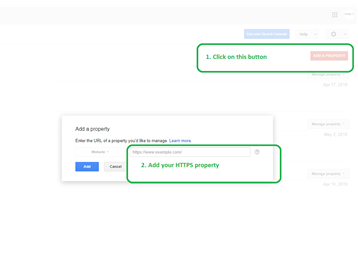
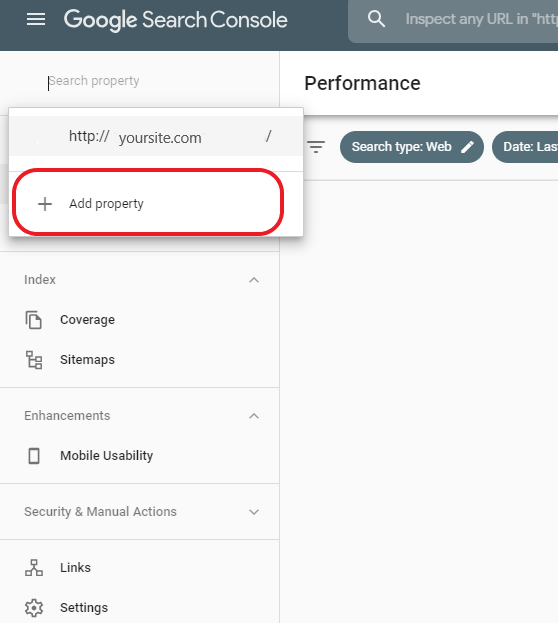
- Go to Google Search Console.
- Click on Add a property on top right side.
- Add your website’s new HTTPS address in the popup.
- Google will ask you to select a method to prove your authenticity.
- Choose among the following options:
- HTML file upload
- HTML tag
- Google Analytics
- Google Tag Manager
- Based on your selection, Google will walk you through the step-by-step verification process.
- For older version of Google Analytics
For newer version of Google Analytics
Congratulation! You’ve successfully installed the SSL certificate on your WordPress and also completed all of the necessary additional steps that are crucial for SEO ranking!