Facing a pesky SSL error in Android that won’t go away? Here are a few potential solutions
If you’re using an Android device, it’s likely that you’ve come across the browser message that says, “your connection is not private.” Once is fine, twice is okay, but it gets really annoying if you face this message every other day. But don’t you worry — we’ve got you covered. We’ve analysed several possible reasons behind this SSL connection error and have come up with a list of solutions you can easily implement.
In this post, we’ve outlined these seven solutions to help you get rid of this pesky SSL connection error. If one doesn’t work, try the next. Eventually, you should be clear of this warning and start loving your device again.
Let’s get started.
7 Ways to Solve Your Android SSL Connection Error
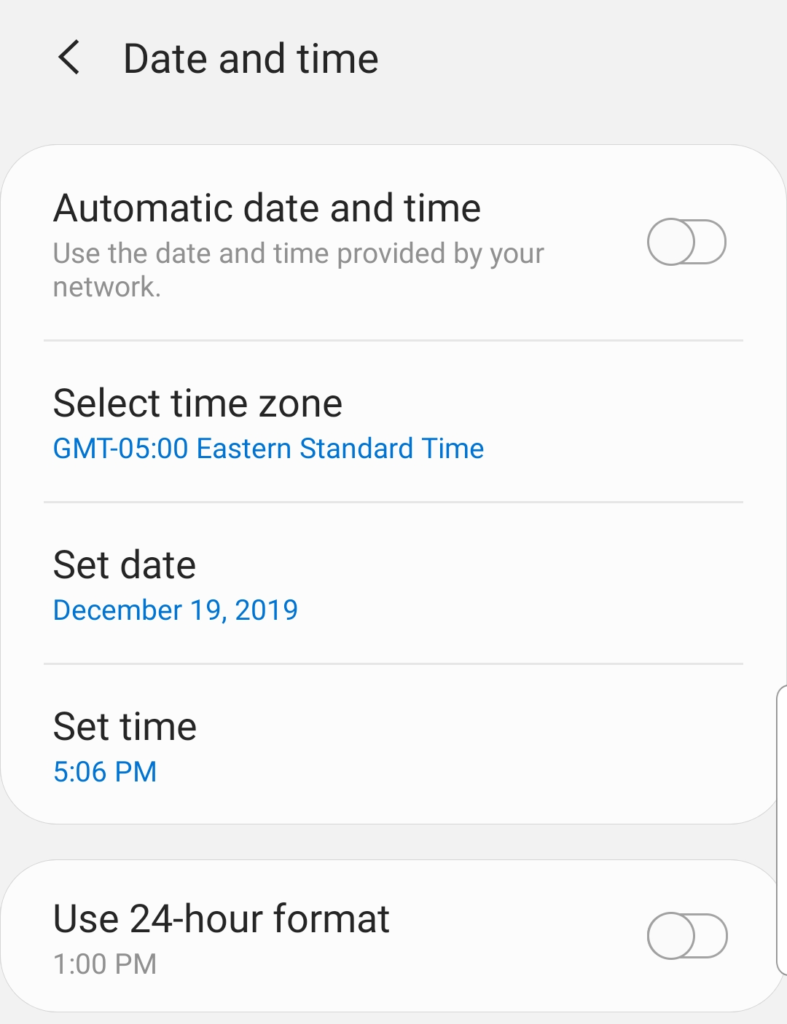
1. Correct the Date & Time on Your Device
This might sound like the easiest and most obvious solution, but users frequently face this error because they have an incorrect date and time set. So, the thing that you need to do is set the data and time option to automatically update. This will ensure that your date and time settings are always current

2. Clear Browsing Data of Google Chrome
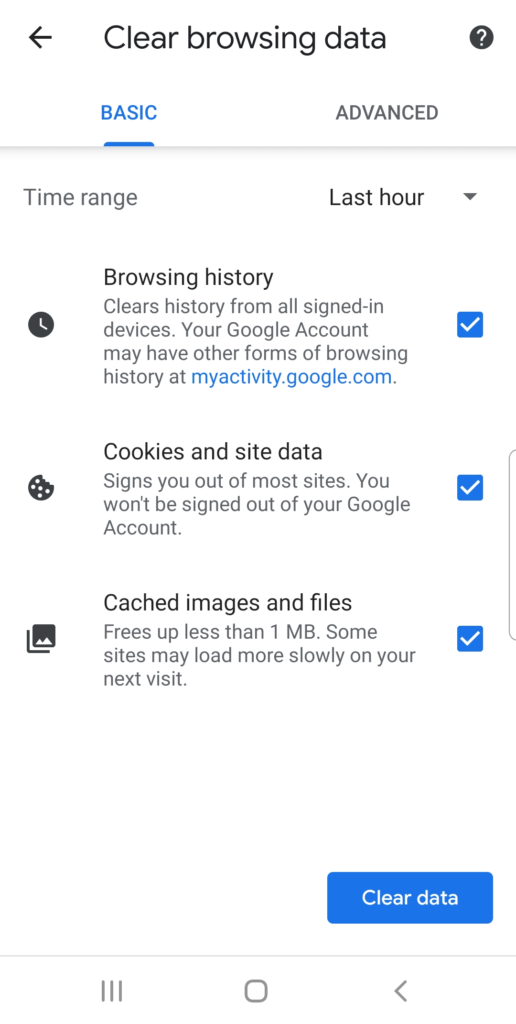
Your browsing history and cache might be causing you to receive this SSL error. The way to move past this is to delete the browsing data. Here’s how you can do it:
- Open Google Chrome and then go to Menu.
- Go to Settings and select Privacy.
- Now, tap on Clear Browsing Data. Check all the boxes and select Clear Data.

3. Reset Your Network Settings
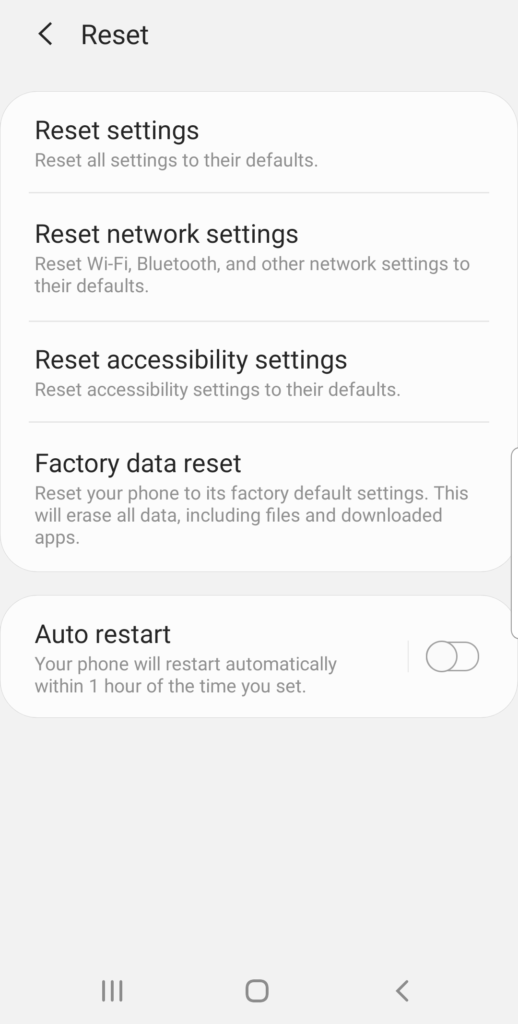
Another thing that might be coming in between you and the website is your network settings. It’s very difficult to pinpoint it to any single reason and, therefore, we suggest resetting your network settings. You can do this by going to Settings and then selecting Network Settings. There, you should find an option that will allow you to reset the network settings.
4. Deactivate Your Antivirus App
Antivirus app/software is one of the most common reasons behind the SSL error. Unfortunately, this problem has only one solution and that, too, is temporary. The solution is to disable your antivirus and then trying to access your website. Please note, however, that it’s never a best practice to disable your antivirus solution because it leaves you vulnerable to threats.
5. Update Your App/Browser
Again, this is a simple solution that’s easy to overlook, but it could be the very solution that you may be looking for. Try updating your app/browser and then the website that’s giving you a hard time.
6. Visit Website in an Incognito/Private Mode
If nothing’s worked till now, this is a solution that you must try. Although it’s a temporary solution, you should open the website in the private/incognito window of your browser.
7. Reset Your Device
Now, this is the last resort. So, carefully consider whether you really want to go for it or not. Resetting your device would mean losing all the personal data on your device, so make sure that you back up all your data before thumping the hammer!
To reset your device, go to Settings and select General Management. There, you’ll next want to choose Reset and select Factory Data Reset. Once you read through all of the information on the next screen, select Reset.

Save Up to 82% on Your Next SSL Certificate!
Get an SSL certificate starting for as little as $8.78 per year.
Shop Now
 (52 votes, average: 4.62 out of 5)