
Your expert guide on how to backup WordPress website and WordPress database manually via cPanel
It must have taken you months or maybe years to develop all the blog posts, website contents, or entire eCommerce store on your WordPress site. But do you know how fragile your WordPress website is? It just takes a single wrong click, an act of negligence, a malicious plugin/theme, or an unfortunate cyber attack to lose your entire website in a split second! You can survive in all those scenarios only if you regularly create backups of your website and save those copies on a location other than your server, i.e., your computer, on a cloud platform like Amazon AWS, Dropbox, Google Drive, etc.
2 Ways to Back Up Your WordPress Site
There are two ways of taking a backup of your WordPress site:
Method 1: Automatic WordPress Backup (recommended). You can automate the WordPress backup process by using some tools/plugins. It is a risk-free, fast, and secure method. The automated backup tools are available from $1.63/month and come with a variety of benefits, including:
- free storage space on the cloud platform,
- real-time change alerts, malware scanner,
- strong encryption of the backup files,
- easy restoration, and
- auto-delete facility of old backup files.
For more information, check out our article: How to take WordPress backup automatically.
Get CodeGuard for Only $1.63/Month!
CodeGuard: The Best WordPress Automated Backup Tool! Get it Today and Save Up to 50% With SectigoStore!
Shop NowMethod 2: Manual WordPress Backup. You can make a WordPress backup manually via cPanel’s directory or FTP/SFTP. To create the WordPress database backup, you need to follow a separate procedure. One of the popular ways of manually making WordPress database backup is via cPanel’s phpMyAdmin.
Note: Manual backups are free, but they’re risky and time-consuming. Plus, they are vulnerable for data theft if you don’t have proper encryption and security settings of your backup files. Deleting old, space-consuming backup files is also a big issue you need to stay on top of with manual backups.
With both of these things in mind, let’s walk you through a few manual WordPress cPanel backup methods.
How to Backup WordPress Website Manually
Part 1
If your hosting provider has enabled the Backup function on your cPanel, follow these three steps to take a backup from cPanel.
If you don’t have access to cPanel’s Backup function or entire cPanel at all, follow the instructions mentioned in part 2.
Step 1: Access cPanel via Your Hosting Site
Login to your hosting account and navigate to cPanel.
Locate the Backup icon under the Files section.

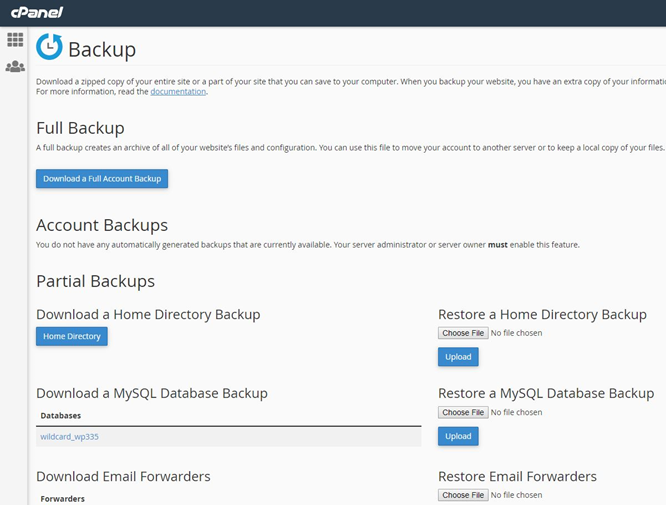
Step 2: Decide What You Need to Back Up
Decide whether you need a backup of your entire site or just a partial backup of website content through the directory, MySQL database backup, or email backups.
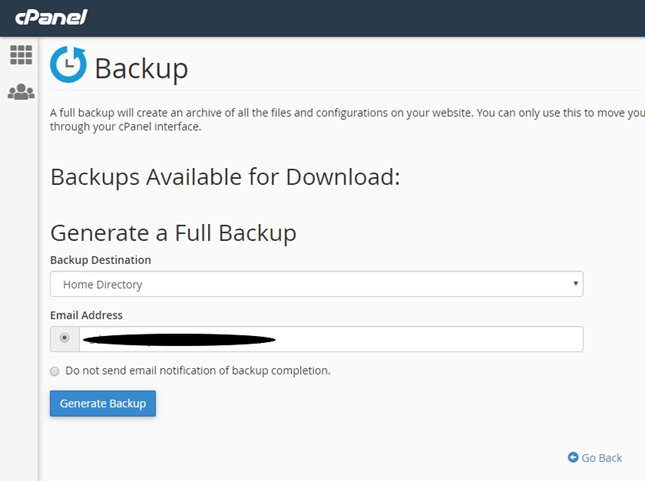
Step 3: Choose Your Backup Location
If you select Download a Full Account Backup, you will be asked for the location where you want to save a backup copy. Click on Generate Backup. Note: Full backups cannot be restored via cPanel.
Once the backup is created, download it to your computer and encrypt it. Alternatively, you can store a copy on a third-party cloud platform for better security.
Part 2
If your hosting provider has disabled the Backup function or hasn’t given you access to it, follow the below steps to take a backup from cPanel directly via the directory, FTP and phpMyAdmin.
There are two parts of taking WordPress backup manually. The first is for the website itself and the second is for your WordPress databases.
Backup Your WordPress Site Content (such as text, media, themes, plugins, etc.)
- Via cPanel Directory
- Via FTP
Note: If your hosting provider hasn’t provided you cPanel’s access, you must take backups from FTP/SFTP.
Backup of WordPress Databases
You can do this via phpMyAdmin.
WordPress cPanel Backup Via cPanel Directory
Step 1: Access cPanel Through your Hosting Account
Login to your hosting account and navigate to cPanel.
Step 2: Navigate to File Manager Under the Files Section

Step 3: Select the Web Root Folder to Back Up Your Site Files
Locate public_html in the menu on the middle part of the page. Right-click on it and select Compress.
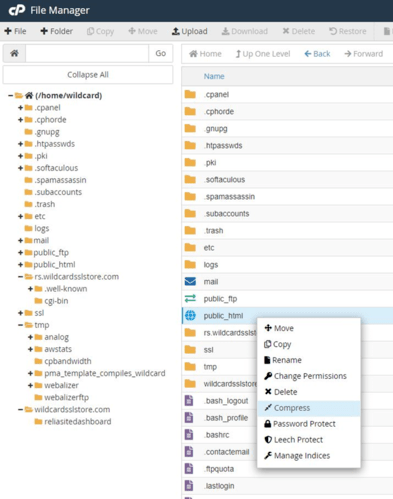
Note: If you have more than one site and want to take a backup of only one site, select the website’s folder under public_html and compress only that folder.
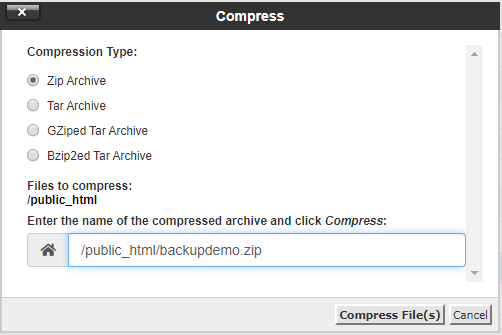
Step 4: Compress the File
Choose the compressed file’s type and path. We have decided to put our backup file under public_html and name the backup file “backupdemo.zip.” You can choose any location and file name you prefer. Click on Compress File(s) to start the compression process.
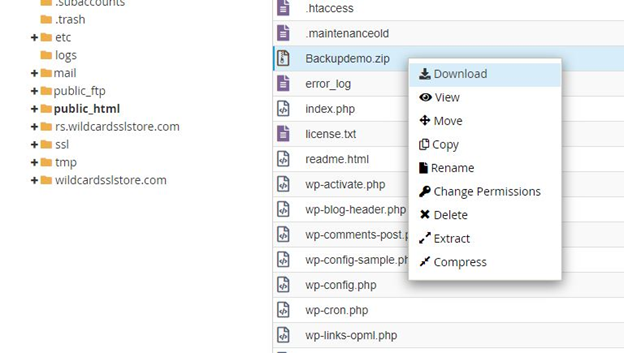
Step 5: Locate and Download the Compressed Folder
Once the compression is done, locate the compressed file by following the path you chose in the previous step. As you can see in the screenshot below, our backup file “Backupdemo” with zip extension is stored under public_html. Right-click on it and hit Download.
WordPress cPanel Backup Via FTP
Manually making a WordPress backup via FTP is a time-consuming process. If you have access to your cPanel, follow steps 1 to 4 to set up the FTP account.
If you don’t have access to cPanel, contact your hosting provider and ask for the following details for your FTP account:
- FTP username and password,
- FTP server information, and
- FTP & explicit FTPS port number.
Once you get all the details as mentioned above, follow the instructions from step 5.
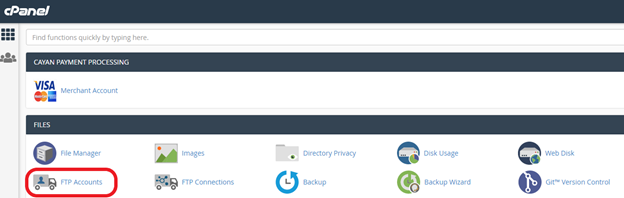
Step1: Access Your FTP Accounts via cPanel
Login to your cPanel account. Click on FTP Accounts under Files Section.
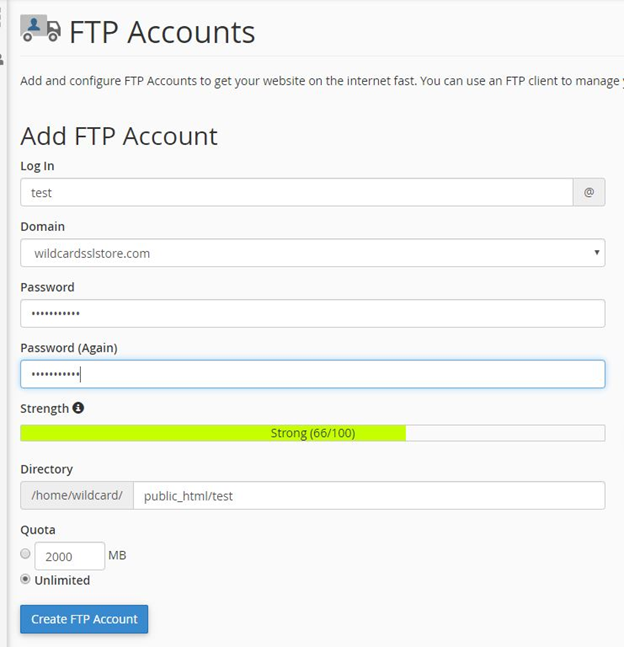
Step 2: Create an FTP Account
You can do this by filling out the Add FTP Account form (shown below). Choose any username and password as your login credentials. We have written “test” here as our username for the sake of this example. For the directory, you can choose public_html or any other folder you want to backup. Click on Create FTP Account.
Once the FTP account is successfully created, you can see it on the same page, right below the FTP Accounts section.
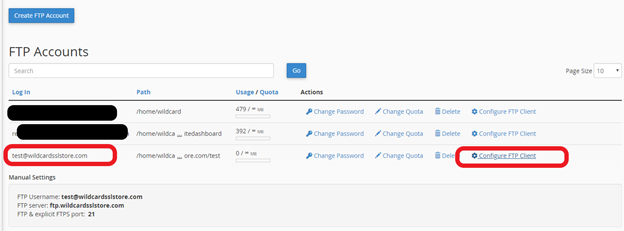
Step 3: Configure the FTP Manually
Click on Configure FTP Client from the right-hand column in the row of the FTP account you created.
You will see the details like FTP Username, FTP server, FTP & explicit FTPS port under Manual Settings.
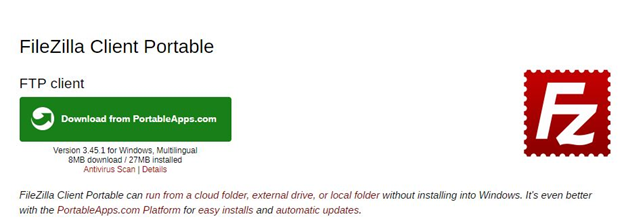
Step 4: Download and Install an FTP Client
Now that your FTP account has been created, download a third-party FTP client. In this example, we used the FileZilla tool. Click here to download, install, and run the portable FileZilla on your computer.
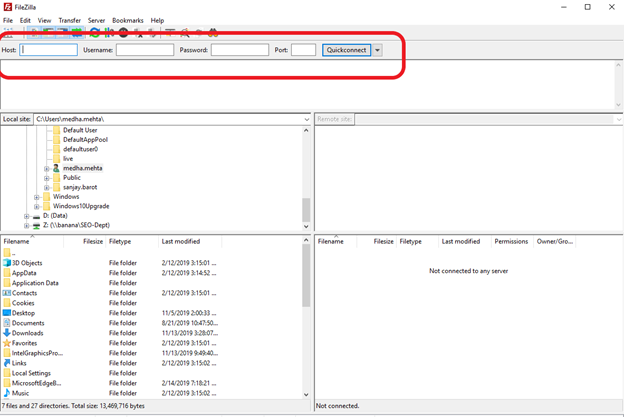
Step 5: Enter Missing Information in the Highlighted Fields
You will see the following screen. Fill out the below highlighted four fields, namely Host, Username, Password, and Port. Remember: You will get this information from your FTP account, as mentioned in step 3. Click on Quickconnect.
Step 6: Take Backup to the Local Computer
As soon as the server connects, you’ll see the files and folders of your directory in the right-hand column of the window under Remote site. Next, right-click any files and folders you want to backup and select download. You can download any files/folders you want from this section and save it to your computer. You can also drag the files from Remote Site and drop them to the Local site section of the window.

Backup WordPress Database via phpMyAdmin
Follow these steps to manually backup the WordPress MySQL database from cPanel.
Step 1: Access cPanel via Your Hosting Account
Log in to your hosting account and go to cPanel.
Step 2: Locate phpMyAdmin
Under the Database section, locate and select phpMyAdmin.

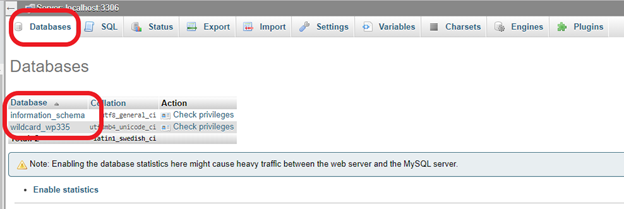
Step 3: Choose the WordPress Database You Wish to Back Up
Under the Database tab, you will see all of the databases for your website. Click on the database which you want to back up.
Step 4: Select Database Tables to Export
Once you click on the database, you will see the database tables under the Structure tab. Select the necessary tables by clicking on the checkbox
You can choose each table individually, or you can choose all tables by clicking the Select All button at the bottom of the page or by pressing and holding the Shift key on your keyboard while clicking on the first and last tables.
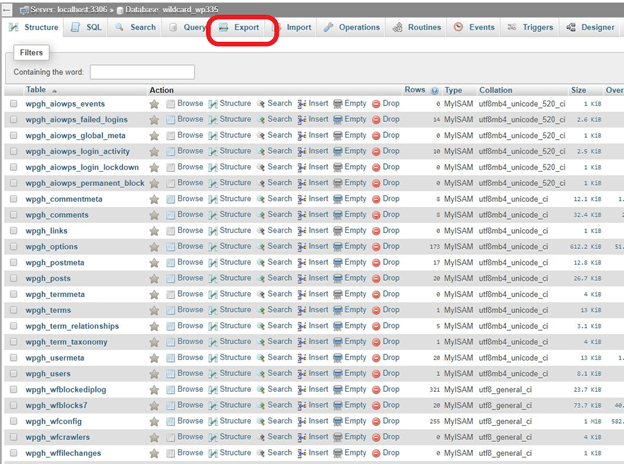
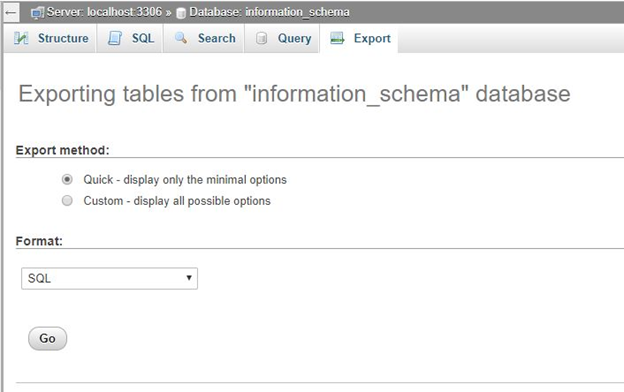
Step 5: Choose Your Export Method and Format
Hit Export from the top menu. Click on Go after selecting the export method and format as per your preference.
Congratulations! You have backup your WordPress website and its databases successfully. Pat yourself on the back because manual back ups are often more complicated and risky than automated backup method.
So, if this is the route you choose, be sure to encrypt the backup files to keep them safe. Also, make a date-labeled folder on your computer to save all the backup files and to keep them organized. If possible, save the backup files via a cloud platform, too, for additional safety in case something happens to your primary backup files.